

I searched for a modern calendar for our mud room for over a year before finding the Girl Friday acrylic calendars that were EXACTLY what I was looking for! I spent another month angsting over the cost before doing a commercial photography shoot and getting the calendar as a present for myself.
When it arrived, my husband took one look at me and the wall anchors and told me that I was welcome to hang up the calendar…whenever I was ready to do it by myself. Luckily for me, I was on Day 2 of a steroid prescription and I was Ready To Do All the Things. Even The Things that involved drills and wall anchors and potential permanent damage to our home!
So. If you, too, find yourself with the most beautiful calendar in the whole wide world but no husband willing to take the lead on the project, here’s how I did it!
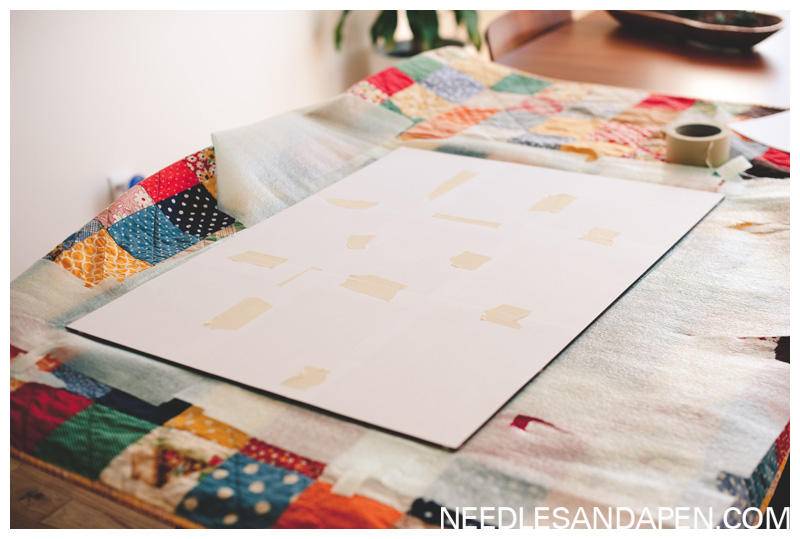
Step 1: Create a template for the calendar out of 8.5×11 paper. Basically I laid sheets of computer paper on top of the calendar and then taped them all together. I then used a pencil to press out holes where the hardware would go.
![]()
Step 2: Measure your wall and then tape the template where you think you want the calendar. Check your placement with a level and remeasure out your borders about 8 thousand times. We are breaking out the drill bits here, people, you better KNOW those holes are level.
![]()
Step 3: Watch some YouTube videos on installing wall anchors. Use a stud finder to make sure you aren’t drilling into any studs or electrical wires. I started with a significantly smaller drill bit than I would use for the final holes because the real drill bit seemed terrifyingly large. At this point, as I started tearing up the wall, Nic came over to investigate. He told me he liked my “advanced drilling method.” I looked at him blankly. “You have the drill set to reverse, which some people do to prevent yourself from getting tugged into the wall.” “Oh yeah,” I said. “I totally saw that on YouTube and completely know exactly how to change that setting on this drill.” (It actually made a big difference for me over my initial drilling attempts a few months ago in the garage. I recommend my accidentally advanced drilling techniques.)
![]()
Step 4: Just know that when you hammer in the wall anchors it’s gonna seem like either the wall anchors are too big or your hole is too small. Keep the faith. It’s like birthing a child. It doesn’t seem like that thing is gonna fit, but push harder and it will pop through.
Step 5: Look at all your wall anchors and pray to God they are going to fit the holes in the calendar.
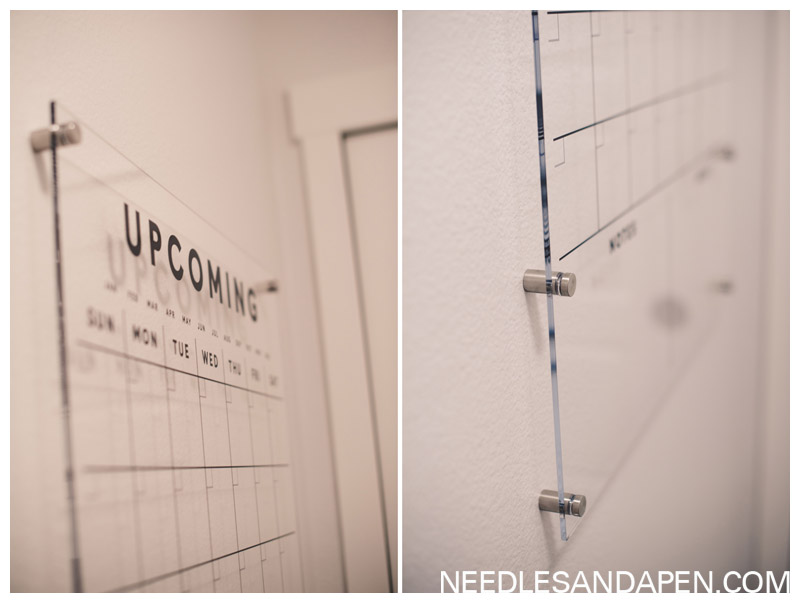
Step 6: Screw in the stand-out hardware.
![]()
Step 7: At this point you need a buddy to help you put up the calendar and make sure you don’t scratch the back as you place it on the stand-outs. (It’s kind of annoying to get the project this far and not be able to take it over the finish line all by yourself, but that’s just how life is sometimes.) We left the protective sheet on the front until the very end.
![]()
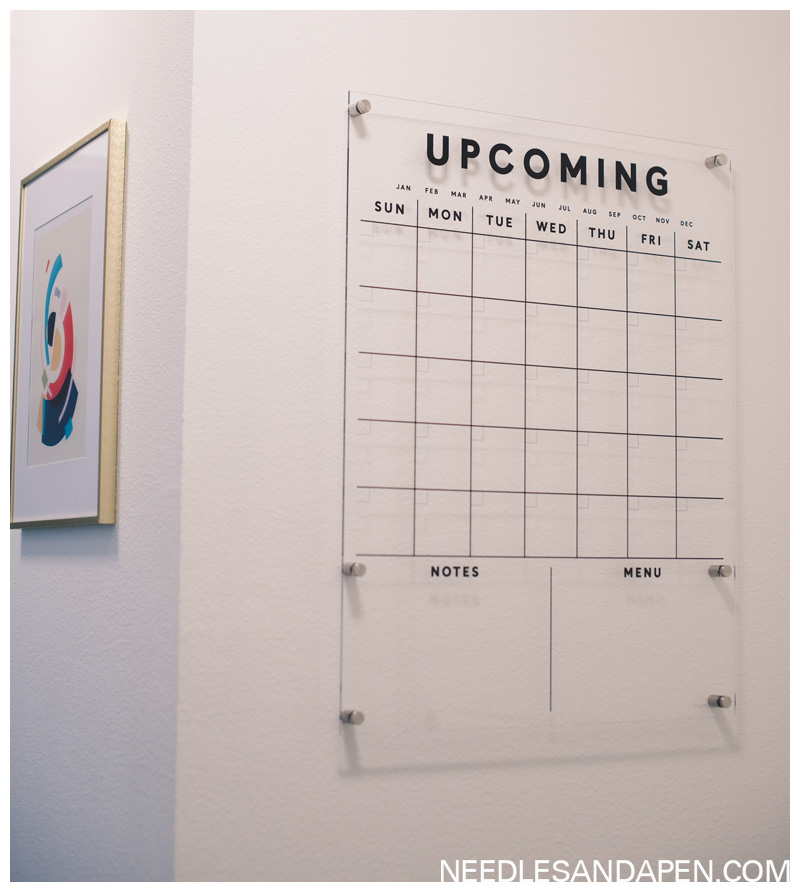
Step 8: Peel off the protective sheet and bask in your DIY awesomeness.
The installation took about 2 hours from start to finish, including making the template and obsessing about the measuring and being very careful and timid about the whole thing.
It’s the first thing you see as you walk through the garage door and I absolutely LOVE IT, and my youngest loves seeing what it happening in our lives and what is coming up next on her dinner plate. Here’s a cell phone action shot of her adding “pizza” and “cereal” to all the meals of the week that gives you a feel for the awesome scale of this 23″x30″ version:
![]()
![]()