Mother's Day Pictures

May 13, 2008

Our engagement shoot with Bernadette and Haydn this weekend had to be canceled because of weather, so for the first Monday in a long while, I don’t have new engagement photos to show!

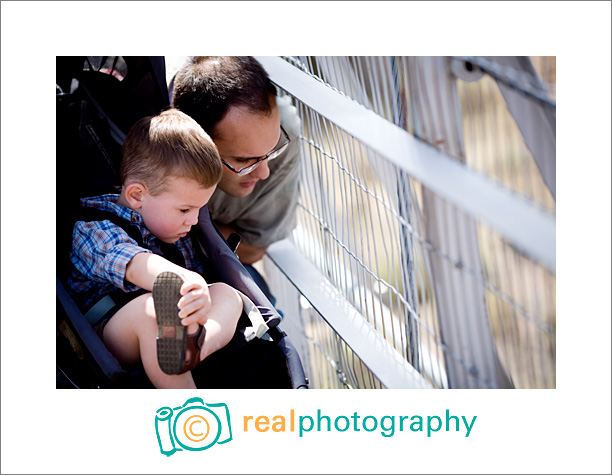
But we did have a wonderful Mother’s Day that included breakfast at The Egg and I (a hearty breakfast is one of the Turchin fam’s favorite things) and a trip to the Royal Gorge in Canon City.

colorado springs photographer and son

colorado springs breakfast

After breakfast we drove and drove and drove (I wasn’t sure where we were going–it was a surprise) to the Royal Gorge.

colorado springs car ride

The highlight of the trip for Will was seeing the trains. He wanted to watch the train from the bridge forever!

colorado springs wedding photographer and son

Posted in News


RadioPopper Review

May 10, 2008

It’s intimidating to write a review about something that the Strobist has covered in a much more qualified way. But here I am, writing about it anyway, because it’s a new piece of equipment, and I was lucky enough to be in one of the first batches of people receiving it! (And because I think I came up with a clever “fix” for something I read someone complaining about.)

Who needs to read a review about RadioPoppers?

Professional photographers and seriously dedicated enthusiasts. This is definitely a blog post to skip if photography equipment doesn’t get you all weak in the wallet and you never plan on having more than one external flash.

What are RadioPoppers?

They go to great length on their website to avoid saying it, but I will. They are a newer cooler version of Pocket Wizards.

Pocket Wizards allow you to trigger many flashes when you take a picture. The downside is that you have to set the flashes manually–you can’t use the ETTL system. But the downside of using the ETTL system and not Pocket Wizards is that ETTL uses “line of sight”–your flashes have to see each other for it to work. So if you want to light up the wall behind a bride by sticking a flash behind her, it won’t work. If your flash can’t see the other flash, you’re dead in the water.

RadioPoppers solve that. You get to use ETTL, but the signal travels by radio, so you don’t have to worry about line-of-sight.

RadioPoppers are also fantastic for high speed sync issues.

My Genius Fix

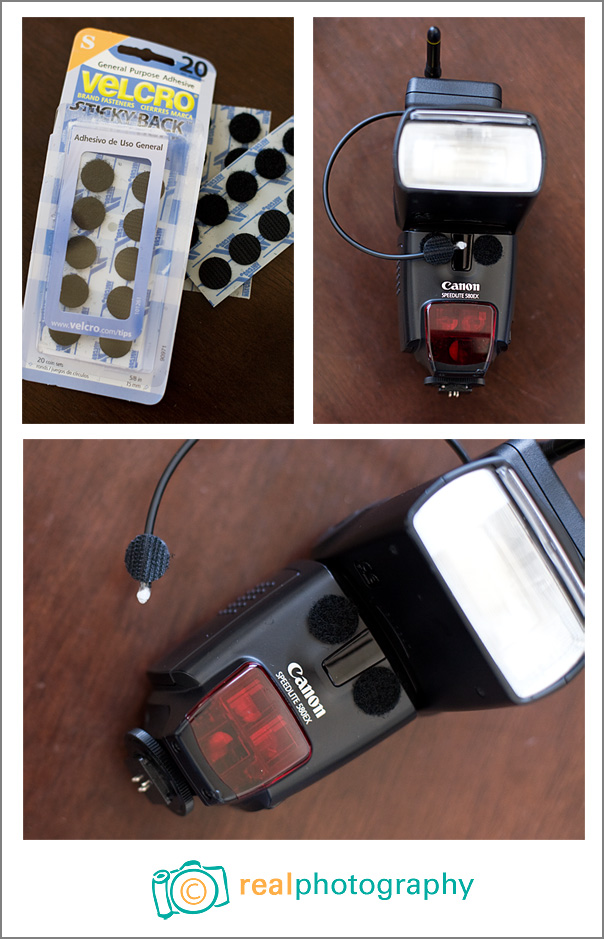
The downside that Nic spotted (and I had read) was that it becomes sort of important that your receiver units stay on their flash because while the main box part is held on with velcro, the optical receiver (which I will call the “long tubey thing”) needs to be stuck to the appropriate part of the flash. RadioPopper recommends gaffers tape, which you could take off without gunking up your flash, but it would be inconvenient to do that every time you want to use it.

My solution? More velcro.

wedding photographer tool: radiopopper

Adhere two sticky-back velcro tabs around the long tube thingy, put two other sticky-back velcro tabs on your flash, and voila! A way to easily remove and attach the radio popper receivers.

It has the added benefit of being a little more flexible–as you rotate your flash head around, you don’t need to worry about the long tubey thing (optical receiver) getting too tight.  You can just attach it to whichever side works best.

Bottom Line: RadioPoppers are exactly what I was looking for as a solution for wedding and portrait work. Allows me to use ETTL without the restrictions of line-of-sight. And with a little extra velcro, they’re even better.

Posted in News


This week’s photoshop tip is brought to you by Jan (father of this not so little anymore baby), who asked me to talk about the vignetting I use on 99.8% of our pics.

colorado springs engagement portrait

First of all, to the sticklers out there, I apologize for calling it vignetting. Actual vignetting is a lightening as the picture goes toward the edges, like this (not the world’s best example, but you get the idea).

But in today’s trends, that kind of vignetting isn’t what people mean when they talk about vignetting. In fact, they mean the opposite (which is actually called fall-off)…the photo gets darker as it goes toward the edges.

I love vignetting (the dark kind). I think it really frames a photo and makes the subject pop. I tend to be more heavy-handed in my vignetting than some photographers (especially with my black and whites) because I adore it so.

Vignetting can occur naturally or be an added effect.

When I use a wide angle lens on my 5d, I get some “fall-off” naturally…and some people call that a “con” of the 5d, but for me, it’s like AWESOME! Saves me some time in Photoshop!

But usually, I’m adding the vignette, not “correcting” it. Here are the four ways that I add vignetting.

The free way:

When I first started our business this was my method:

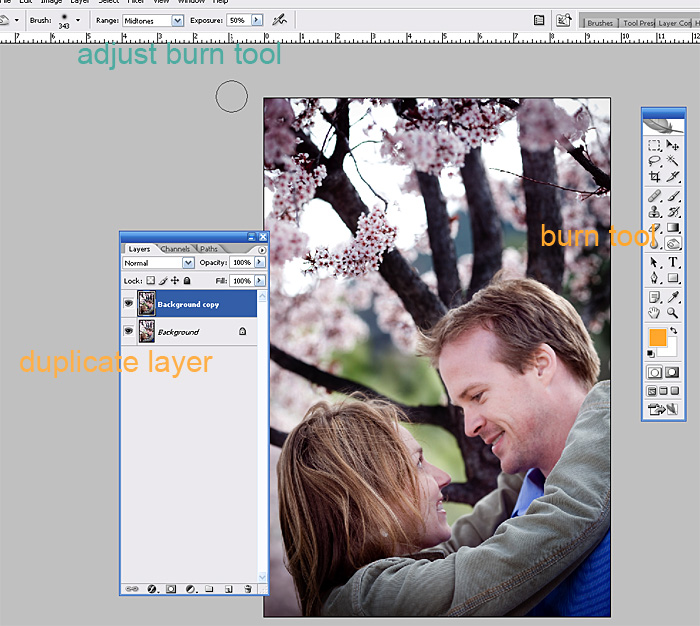
Use the “burn” tool in Photoshop. Make a duplicate layer of your background photo, burn the edges or general background area, and then lower the opacity of that lower until the vignette looks as good as you want it.
colorado wedding photographer tip

Pros: Free if you already have photoshop. Total control over where your vignette is (which is why I still occasionally go with this method).

Cons: You can’t burn in anything that is totally white, so if your sky is completely white, you’re out of luck.

The free-if-you-have-Lightroom way:

I use this 75% of the time now.

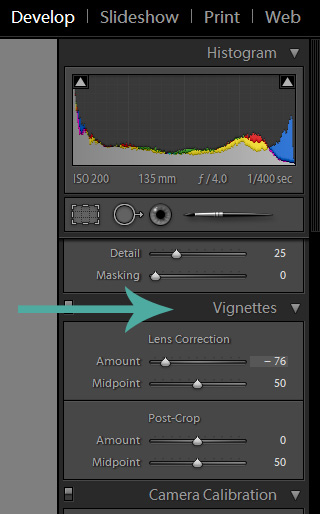
Go to the lens correction panel and adjust the sliders. Farther to the left the top slider, the darker it will be. Move the midpoint slider to bring the vignette farther into the center of the photo.
colorado springs wedding photographer vignette tips

Pros: Easy peasey and almost free.

Cons: It applies the vignette to the pre-cropped photo. (Lightroom 2.0 does a post crop vignette, but call me crazy–it doesn’t look as good)

The $150 way:

(Before getting Lightroom, I used this 99% of the time…now I use it 24% of the time)

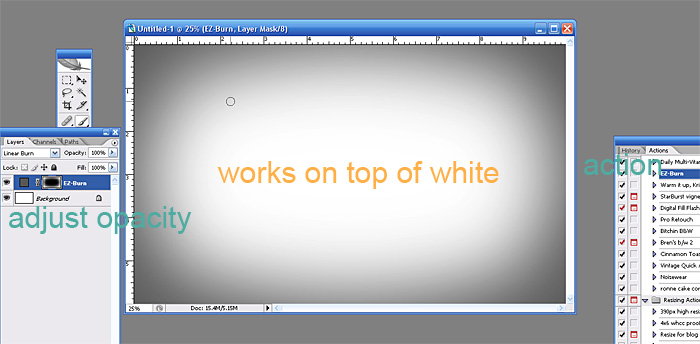
The Totally Rad Actions by Boutwell Studios has an “e-z burn” action that makes a very pretty vignette with the press of a button. Most photogs find this to be too strong and really drop the opacity. I usually use it at around 80%:
colorado springs wedding photographers screenshot

Pros: Easy. Awesome.

Cons: Expensive if you are only using it for the ez-burn action. If it’s used over a really light area, you can see it halo out toward the center and I’m not in love with that

The Other Expensive Option:

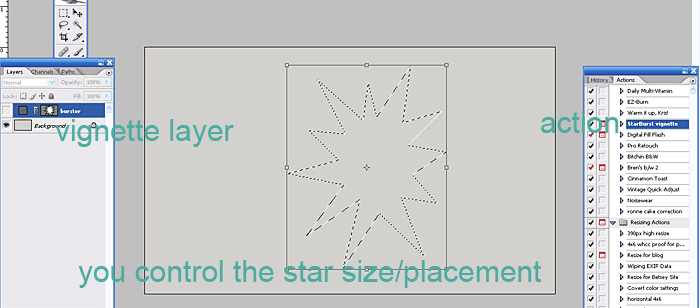
1% of the time, the Starburst Vignette in the Kevin Kubota Action Pack II is my vignette. It creates a star shaped vignette (looks way less god-awful than that sounds, so stay with me) and is best when you have a photo that needs a vignette, but you don’t want that haloing from the Totally Rad E-Z Burn and you can’t be bothered to burn it in yourself with the burn tool.
vignette by colorado wedding photographer

Pros: Subtle shape of vignette.

Cons: I hardly use it. The set is expensive if you’re just buying it for a vignette action that hardly gets used.

If anyone else has any requests for photography tips or photoshop tips, ask away!

Posted in Photoshop Tips