Photoshop Fridays: Week 2: Creating a Border in Photoshop
Mar 21, 2008
One of the first things I wanted to do when I was a brand new photoshop newbie was make a border around my photos.
The thing about photoshop, is that there are as many ways to get an end result as there are people. Of course, all of those ways are not created equal, and my very first way was absolutely awful.
Want to waste time and lose a little bit of your photo when making a border? Do what I did and use the line tool to make four lines and then put them around the edge of your photo.
It took me a few days to figure out a better way: the “canvas size” way.
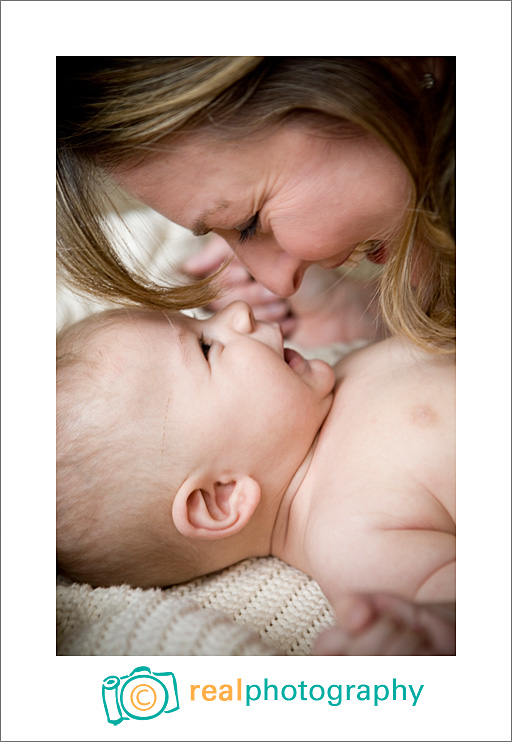
1. Open a photo. In this case, we’re going to open one of my faves from my recent session with baby Eli:
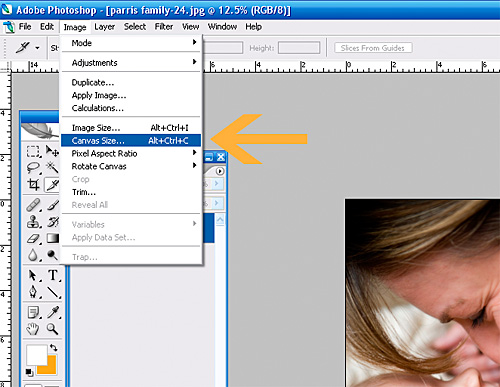
2. Go to IMAGE>CANVAS SIZE.
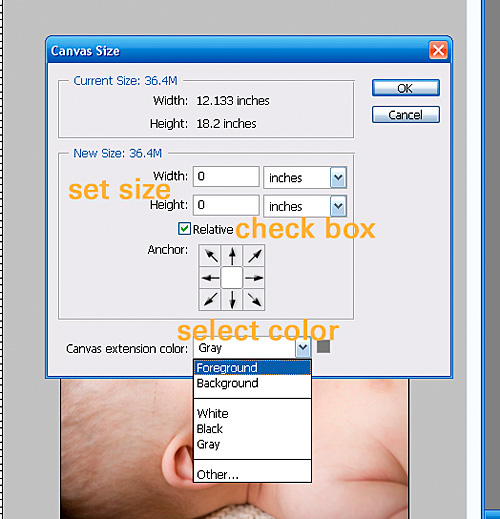
3. In the pop-up menu, select your border color (you get to choose from white, black, grey, your foreground color (in this case, brown) or your background color (in this case, orange–both the foreground and background colors are seen in your tools window) .
4. Check the “relative” box.
5. Enter the size of your border.
And there you have it. Simple and fast! If you want to create a double border (like the white border with thin gray border I used), you just do this process twice.
Posted in Baby Photographer, Photoshop Tips
Comments